

Wall-mounted pressure washers offer convenience, efficiency, and space-saving benefits for various cleaning tasks. Whether you’re a homeowner or a professional cleaner, properly installing a wall-mounted pressure washer is essential for optimal performance and longevity. In this article, we provide a comprehensive guide to help you navigate the installation process, ensuring a successful setup of your wall-mounted pressure washer.
Pre-Installation Preparation:
1. Selecting the Right Location:
Choose a suitable location for your pressure washer, considering factors such as accessibility, water source proximity, and sufficient space for hose connections and maneuvering.
2. Assessing Water Supply:
Ensure you have a reliable water supply with sufficient pressure and flow rate to support the pressure washer’s requirements.
3. Checking Electrical Requirements:
Determine if your pressure washer operates on electricity and confirm the availability of an appropriate electrical outlet near the installation area.
Necessary Tools and Equipment:
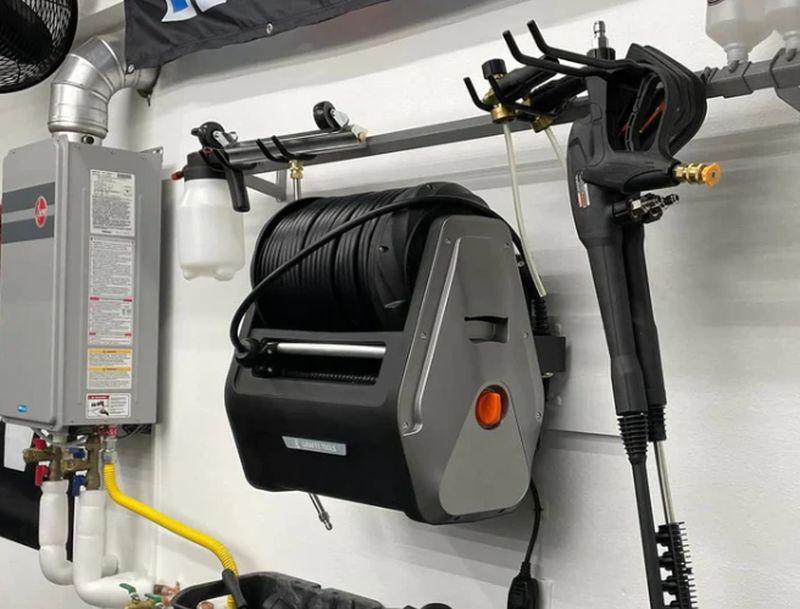
1. Wall-Mounting Bracket:
Acquire a sturdy, wall-mounting bracket specifically designed for your pressure washer model.
2. Anchoring Hardware:
Gather the necessary screws, bolts, and anchors to securely attach the bracket to the wall.
3. Water Connections:
Purchase high-quality hoses, connectors, and fittings compatible with your pressure washer’s specifications.
4. Electrical Connection (if applicable):
If your pressure washer requires electrical power, ensure you have the appropriate extension cords and electrical connectors.
Installation Steps:
1. Mounting the Bracket:
Use a level to ensure proper alignment, mark the bracket’s screw holes on the wall, and securely attach the bracket using the provided anchoring hardware.
2. Attaching the Pressure Washer:
Carefully place the pressure washer onto the mounted bracket, ensuring it is securely fastened and level.
3. Water Connection:
Connect the water supply hose to the pressure washer’s inlet, making sure to use the appropriate fittings and seals to prevent leaks.
4. High-Pressure Hose and Spray Gun:
Attach the high-pressure hose to the pressure washer’s outlet and connect the spray gun to the other end of the hose, ensuring proper tightening and alignment.
5. Electrical Connection (if applicable):
If your pressure washer requires electricity, connect it to a nearby electrical outlet using the appropriate extension cords and connectors, following safety guidelines.
Post-Installation Considerations
1. Testing and Adjusting
Before using the pressure washer, run a test cycle to ensure proper water flow, pressure, and functionality. Adjust any necessary settings according to the manufacturer’s instructions.
2. Regular Maintenance
Adhere to maintenance schedules provided by the manufacturer, including routine inspections, cleaning, and replacing worn-out components.
3. Safety Measures
Familiarize yourself with the pressure washer’s safety features, proper usage techniques, and recommended personal protective equipment (PPE).
Conclusion
Installing a wall-mounted pressure washer requires careful planning, proper equipment, and attention to detail. By following this comprehensive guide, you can successfully set up your pressure washer, ensuring optimal performance and longevity. Remember to prioritize safety, maintain regular maintenance routines, and consult the manufacturer’s instructions throughout the installation process. With a properly installed wall-mounted pressure washer, you’ll be equipped to tackle various cleaning tasks efficiently and effectively.
Article Submitted By Community Writer

