


Kitchens form an important part of a house. And an outdoor kitchen can create wonders for people who like to socialize a lot. It helps you mingle with your friends while you are cooking their favorite dishes. You can engage in talk and cook at the same time. The following guide will explain you how to go about the process of building an outdoor kitchen. Read on.
Complexity Level: Moderate
Time Required: It depends from person to person, but when built at a normal speed, it would take around 2 weeks.
Resources Required
- Stainless steel grill
- Plywood base
- Construction adhesive
- Metal feet
- Nails
- Hammer
- Stones
- Saw
- Drill driver
- Screws
Instructions
1. Frame building

The frame should be built first. With the help of a circular saw you need to cut edges to build the corner posts of each box. Decrease the thickness of counter tops and the standoff’s of metal posts. Holes should be drilled with the help of a drill driver on both ends of the posts.
2. Frame sheathing

The boxes should be screwed together by keeping them beside each other. Panels should be cut so that they fit the frame of the box. Adhesive meant for construction should be spread on the posts and the stretches of the boxes. Next, you need to make cabinets from plywood and in dimensions which fit the frame. Fit them in the frame and stick them with construction adhesive.
3. Attaching the lath

The builders felt should be stapled together to the plywood with the help of the staple gun. Cover the entire plywood area and make sure you overlap the sheets so that water does not touch the plywood. Roofing nails made from stainless steel should be used to attach the lath to the plywood. Hammering the lath to the plywood is a must so that it remains in place. The lath should be overlapped on the edges as well to fit it perfectly.
4. Lath trimming

With tin snips, you need to trim the lath.
5. A scratch coat should be troweled on

Mortar should be mixed with water in a mixing trough of a peanut butter consistency. Apply this mixture to the trowel which is hung upside down with the help of a masonry hoe. Let this scratch coat dry for an hour or so.
6. The mortar should be scored

With a notched trowel the hard dried surface of the scratch coat should be scored. You can start at one end of the island you have built and move horizontally. Keep doing this until the entire scratch coat is grooved. Now, fit the cabinet boxes in the open frame and fit them properly until the edges of both the frame and cabinet meet. Screws should then be used in drilling the boxes to the mortar frame.
7. Stone placement

Next step is to get the stone of various sizes which will make various patterns. Starting with the corner piece you should apply the mortar with the help of a pointing trowel to the back of the stone and fit it to the island counter top. These L-shaped stones will form V-shaped pockets on the corner. Don’t forget to scrape off the excess mortar from the stones or else it will jut out after fixing the stones.
8. The first course should be set

One by one the L-shaped stones should be fit well and no loose stone should be left.
9. Stone shaping

Fit the stones from the sides and where they intersect they should be shaped with the help of a grinder with a diamond blade. This will fit them together and stay tight.
10. Large stone should be trimmed

With the help of a miter box and a diamond blade you should trim uneven stones from the sides. This will level the stones and give a fine finish.
11. The rest of the frame should be veneered

The next step is to veneer the rest of the stones in their respective places. After the first course is done the next courses should be fitted.
12. Fixtures should be fitted

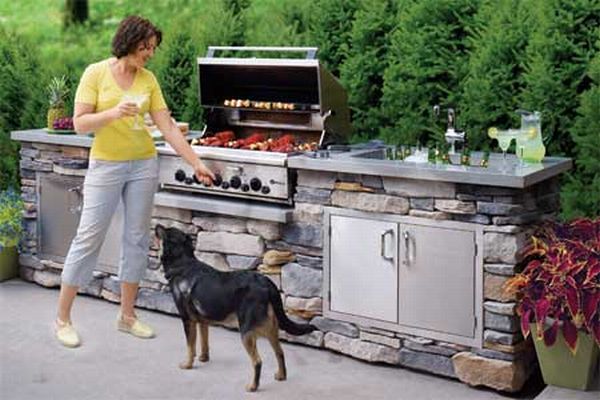
After the stones have set for about 24 hours the other fixtures should be fitted to the counter and kitchen top. The grill and the counter top should be fitted next.
Quick Tips
1. Don’t forget to allow the mortar applied to the frame to dry before fitting any stone on it.
2. Use the outdoor kitchen when you have a party and you will love to cook and enjoy with your friends.
Frequently Asked Questions
Q: Can a barbecue grill be fitted to an outdoor kitchen?
A: Yes, it can be if the counter top is built with the correct arrangements.
Q: What if a stone is fitted loosely to the island?
A: You need to remove the stone, re-plaster it with fresh mortar and then refit it. Scrape off the excess mortar for a smooth fit.

