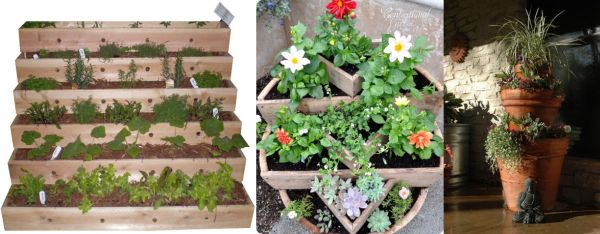

A tiered planter is a beautiful addition to your landscaping. It looks attractive and pleasing to the eyes. If you want to bring in some good changes in your garden, then making your own DIY tiered planter is the best option. Set it against a wall or fence or keep it anywhere, it will save space for you and will provide easy access to the plants growing in it. So, read the following instructions and make an amazing tiered planter for yourself today:
Difficulty Level: Moderate
Time required: 1 hour
Resources required
3 boards, 2 by 12 inches, 12 feet long
Tape measure
Hand saw
Galvanized screws
Electric drill
1 piece ¾-inch plywood, 4-foot square
½-inch drill bit
Garden or potting soil, 28 cubic feet
Estimate cost: N/A
Instructions
1. Measuring and cutting the board
First of all, you need to cut the 3 boards. Measure each board and cut one into four pieces, each piece measuring 4 feet in length. Now, cut the another board into four pieces, each measuring 3 feet in length. Similarly, the third board needs to be cut into four pieces of 2 feet each.
2. Arranging and screwing
Now, arrange each set into three squares. The three squares will be different in size. Then push three screws into corners of each square in order to make a sort of frame. Screw in such a way that the corners behold each other well.
3. Attaching the plywood
If you wish to install the tiered planter on a deck or patio, place the plywood over the square measuring 4-foot. Then attach the plywood into the frame using screws. The plywood gives a beautiful look and finish to the tiered planter.
4. Setting first frame
Now, flip the frame that measures 4-foot. Place it wherever you want but make sure that the place should be such that gets enough sunlight. Now fill the frame with soil.
5. Setting second frame
Now, place the frame measuring 3-foot over the frame that has already been set after filling soil. Now, fill it with soil.
6. Setting last frame
Now, set the frame measuring 2-foot over the 3-foot frame. Now like the 4-foot and 3-foot frames, fill the 2-foot frame too with soil and your very own tiered planter is ready to adorn beautiful plants.
Frequently asked questions
1. Can the measurement of boards vary?
Ans: No, it should be proportionate. Like here we followed the ratio of 4, 3, and 2. If you want to keep the size of your tiered planter small or large, keep it either in the proportion of 3, 2 and 1 or 5, 4 and 3 respectively.
2. Is it necessary to use plywood?
Ans: No, it’s not! But using plywood adds to the overall look of the planter.
Quick tips
1. Drill small holes into the plywood for drainage.
2. While cutting the wood pieces, make sure you measure twice and cut once.
Things to watch out for
1. Be careful while you cut the board using sharp edge tools. A little carelessness can lead to injuries.
2. Set the planter at appropriate place, where the plants can get natural sunlight.
3. Use good quality plywood.
4. Using cedar wood is recommended since it’s rot-resistant.