
Today, many people have started working from home. Freelancing, online selling and buying, booking tickets and other small-scale businesses. This kind of work does not fetch so much turnover to buy an office-space in an apartment. So, it is quite prudent to operate from home. This is not as easy as it seems, though. For instance, continuous in and out of friends and family members, blaring television, music players and in case of married couples – kids wasting their time around. In such a scenario, working is quite hard.
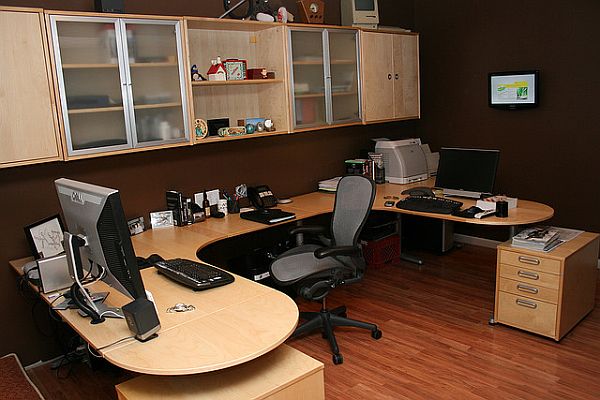
This leaves only one place to tap for the office space i.e. basement. The place is usually loitered with broken and not-frequently used materials. If these materials are cleared away, this dull place can become the perfect location for a home-office. In addition to the space, it is located away from hustle of daily life, giving more peace and aura of concentration and seriousness to the place, which have a positive impact on the work.
Difficulty: Moderate
Time required:
As this may take up at least an entire day, it is advisable to set things up during the weekends when there is no extra work to do and all the family members are available to help setting the things up.
Resources required:
- Desk
- UPS or surge protector
- Computer
- Printer
- Monitor
- 2×4 plywood
- ½-inch plywood
- 1×2-inch lumber
- Slatboard
- Slatboard hangers
- Screws
- Painter’s tape
- Hammer
- Pry bar
- Circular saw
- Table saw
- Straightedge
- Tape measure
- Stud finder
- Screw gun
- Finish nailer
- Level
- Utility knife
- Safety glasses
Estimate Cost: Considering that the owner already has basic elements, such as computer, hammer and screw gun, the estimated cost of the entire venture will come between $250 and $500. Also, it is worth mentioning that this cost is calculated keeping in mind that there is no wastage of material or breakage of stuff.
Instructions
- First things first. Clear out the basement-space for the office.
- Remove the baseboards from the desk-area using a hammer and a prybar. These baseboards will be used for the shelves. Be careful to wear safety glasses while doing so.
- Take detailed measurements of the area and sketch out a design suitable for the area.
- To support desks and shelves, ledgers are required. Cut these ledgers out of lumber, their height one inch lesser than the desired height of the desk. This is because the desktop will be one inch thick.
- Using screws, attach the ledgers to the studs. Be careful to keep the ledgers at the same level to provide proper orientation to the desk and the shelves.
- It is time to build storage areas below the desk. In order to do so, build two rectangular boxes to serve as the bases for the units. Get a piece of lumber and attach it inside each cuboid. Use screws to give additional support of the lumber. Place the bases in the desirable position and attach them to the wall studs using screws.
- Cut two pieces of plywood of the length equal to the distance between the floor and the ledger strips. Using screws, attach one of the pieces to one of the sides with the help of screws. Repeat the same step for the second piece. The main job of these pieces is to act as panels to close the sides of the storage areas and support the desktop.To make flash front for desk storage areas, use lumber and plywood. This gives a more finished look to the structure.
- Now is the time to make the desktop. To do this, cut out plywood of the desired dimensions of a desktop and place it on the structure created so far. Once satisfied with the orientation and position, attach the plywood with tthe ledgers using screws. For larger or heavier desktops, use thicker plywood. To give the desk a more elegant look, laminate the top and the doors.
- Cut melamine slatboard to the desired size and attach it to the wall studs using screws. Using these hangers, install plywood shelves that will be used for storing office materials, such as records. Cover the front melamine finish with tape to protect the finish from getting damaged while worked upon. Make a line through the tap using utility blade and cut along this line using a circular saw.
- Finally, to make shelves, fit the cut-out pieces of plywood in the shelving unit. Create front supports for the shelves to hold equipment, such as printers, scanners and telephones.
Frequently asked questions
Q: Why should I build office in a basement?
A: A basement is a bonus area in any home. For one thing, it adds more area in the home, and is cost-effective and more convenient than changing houses completely.
Q: Do basements contain Radon Gas?
A: It depends on the construction of the basement. If the planning is well-done, chances of presence of radon gas will be low.
Q: Do I need an architect or a structural engineer?
A: It depends on the requirements.
Q: Is it hard to get planning for a basement?
A: It is usually done by the local authorities, but you can do planning for the basement as well, as long as you are accurate with the dimensions.
Quick tips
- Lighting: As basements are located below the house almost underground, there will always be a problem for lighting. It can be done by painting the walls with more cheerful and bright colors and installing more lights. Glowing fabrics can also be used to give the place a more pleasant look.
- Screening: Not all the things present in the basement can be thrown out. In such a case, use screens to block the cluttered objects in a corner from view. It is much cheaper and feasible than moving these objects to their new homes.
- Break room: Every office needs to have a break room where one can relax or take a cup of coffee. It is not possible to go upstairs to take a break, as it distracts the person from work. So, allot a small area in the basement to be built into a cheerful break-room.
- In order to tackle with moisture in the basement, run dehumidifier in the office. Keep it away from the audible range.
Things to watch out for
- Be careful while planning. Basements cannot be expanded and things can go worse if planning fails.
- Use equipment carefully. If injured, go immediately for a doctor.
- Always use safety-glasses.