
Customization and custom-made objects has become the part of life. People want to customize everything according to their personality and need, which the manufacturers may not know. So, here we are going to introduce you to the insights of constructing your own customized wine rack.
In this post, you’ll be learning about the difficulty level of this project, the time you need to put in to construct the wine rack, all the resources required, an estimate cost of the project which may incur, step-by-step instructions to build the wine rack hassle-free, frequently asked questions which may come to your mind too, some quick tips to make the process easier for you and things to watch out for so that you do not harm yourself.
Difficulty level
The difficulty level for making wine rack is moderate, which means it may require some basic knowledge.
Time required
Constructing the custom wine rack will take 2 – 3 hours.
Resources required
1. Six pieces of threaded steel rod (1/4″) which are approx 8 – 8.5″ long.
2. 24 nuts (each 1/4″)
3. A 3/4″ think sheet of plywood. It should be big enough to cut the design you want to make of your custom wine rack.
Tools required
Some of the tools listed here are not compulsory to have, but having them can make the work easier:
1. Dremmel tool with disc cutter
2. Two adjustable wrenches (which will be used to tighten the nut)
3. Drill bit ( size 1/4″)
4. Pencil
5. # 4 Hole cutter (102 M/M)
6. Power drill
7. Jigsaw
Estimate cost
The estimate cost of the project (assuming that you do not have the materials required) will come out to be something between $ 5 – $ 10.
Instructions
Step 1: Gathering the supplies
In the first step, you need to gather all the materials required to construct the customized wine rack. The materials required in the project are listed in the ‘resources required’ section.
Step 2: Gather the tools
After you have finished gathering the material, now it is the time to gather the tools which you will require to build your customized wine rack.
Step 3: Use your imagination
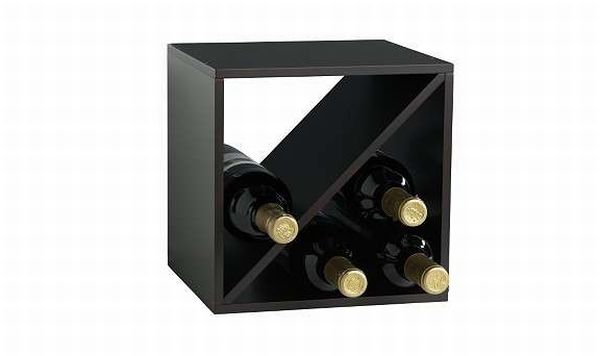
Now is the time to use your imagination. Think in your mind the design you want to make. Visualize it how you want it to turn out, how much bottles do you want it to hold? Does it has the capacity to hold that number of bottles? If not, what can be done? Is your design stable or it may fall and break all the bottles? Will it occupy a little space or more?
All these questions should come into your mind while thinking about the design of your customized wine rack. After you have conceived the idea, it is time to sketch it down on the plywood. Make sure you have enough room in the design to fit the bottles you want to keep inside. You can also use hole cutter to trace the holes to keep the bottle. Also make sure to mark enough locations on the design to drill for the steel rods to go through, to give the wine rack a strong structural support. After marking those locations, drill them. Cut out the holes which you have planned to have for the wine bottles with the help of hole cutter.
Step 4: Cutting the wood
Now it is the time to cut the wood. Secure the wood with C-clamps and cut out the design of the wine rack you made with the help of jigsaw.
Step 5: Cut the holes for your wine bottles
If you have not cut the holes for the wine bottles, you can do it now. You can cut the holes with the help of the hole cutter.
Step 6: Clone your design
Now use the finished wood to trace the same on another plywood.
Step 7: Do it again
Repeat the same process which you did with the former wooden piece to get the final master piece.
Step 8: Assembling
Now using the threaded rods and nuts join both the master pieces. Use both wrenches to tighten each side of the design. Now your master piece is ready to be in action. Insert some bottles into the holes and keep it in the kitchen or where ever you want to and admire it.
Frequently asked questions
1. What designs can be prepared for the wine rack?
You can make any design which comes in your mind. Remember, in creativity, sky is the limit. Conceive a design and cut it out from the ply wood and there you have the design you wanted for your wine rack.
2. What material can be used for the body of the wine rack?
The best material which is economical as well as usable is plywood.
Quick tips
1. Conceive the design of the wine rack before you start gathering the material, so that you do not run out of the plywood.
2. Ensure that the final rack is solid.
Things to watch out for
1. Be extra-cautious while using the jigsaw to cut the wood.
2. The process involves various tools such as jigsaw, hole cutter, etc. Ensure that you know about using the tools and the dangers associated with each tool. If you do not know how to use a tool, have a person with you who can guide you about how to use it.