Don’t know what to do with the piling CD and DVDs? Instead of discarding them into the junk bin, why not apply your artistic side and start creating objects for your home decor. Just for example, a DVD shard can be used to create a decorative tabletop on which you could set your hot teapot. It would add to the aesthetic beauty of your dining room and more importantly give a protection to the tabletop against heat generated by the hot teapot.
Best CD and DVD’s home decoration projects Photo frame
Here are a few simple steps to make out a photo frame using your old DVD.
- Select the photo to be framed. Check the measurements. See that your photo would fit into the DVD frame. If required you may trim your photo a little and then, cut it to the size of the DVD.
- Open up the CD case and get rid of the CD holding part. Remove the back and front art on paper pasted on the CD displaying the trademark and the brand name. Remove the lid too and be careful as not to break your CD.
- Cut a brand new foil to cover the rear of the CD case. While fabricating the foil, leave some extra space at the edges to accommodate the foil when you fold it and turn it around to cover the back portion of the photo frame. If you are employing a recycled foil, it will have a crinkled appearance. If you are using a spanking new foil, press it to a ball and reopen it to get the desired crinkled effect.
- Paste the selected picture on the foil covered CD neatly.
- Fix one photo frame holder at the back of the CD and place it on your showcase or bedside table.
Stenciled CD / DVD coasters:
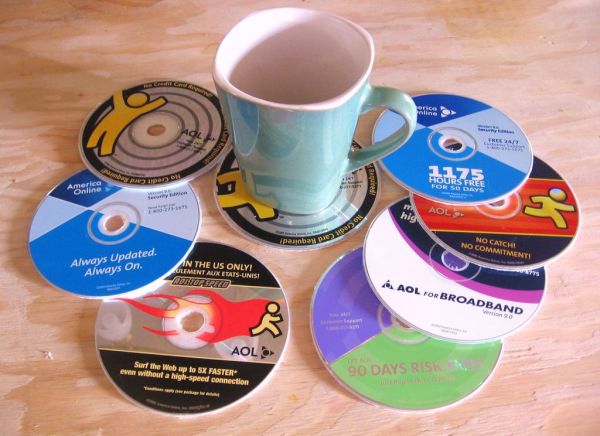
Stencil coasters carved from CDs and DVDs can give a new and elegant look to your dining table. A dash of paint and stenciling would work wonders to these tiny and apparently unusable plastics. Of course, you need to apply your full artistic potential to get the desired results. All you need is half a dozen of recycled CDs and DVD’s, a couple of sandpapers, a bottle of quality glue, felt that would go with your CD colors, a pair of scissors, Dura clear matte varnish, and of course, quality stencils.
- Now getting down to your project work you need to rub the shiny side of the CDs with sand paper to make them rough so that the paint would settle firm and fast.
- Apply different paint for each separate CD.
- Start stenciling different designs and use a fine brush to give the delicate touch ups.
- Give a Dura clear matte varnish finish once the stenciling is done.
- Cut felts into circular shapes one quarter of an inch shorter than the diameter of the CD.
- Use the glue to fix the felt to the back side of the stenciled CDs
Mosaic table
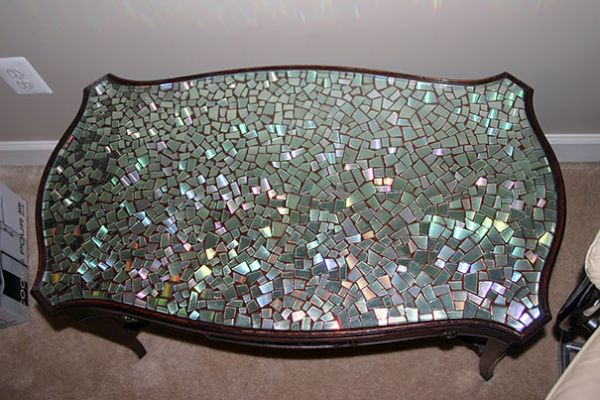
You would be startled to see how awesome your dining table top looks when covered with a coat of CDs and DVD’s. You can cut these plastic discs into different shapes and patterns. Let your imagination fly for that matter to decorate your tabletop uniquely. Try boiling these plastic wares so that they become a little more malleable.
- Use a sharp scissor and cut these discs into different shapes.
- Shiny and gloss would give the discs an added glamour.
- You need to have a jar of quality glue and apply it on tabletop before pasting the CD’s and DVD’s.
- The appearance of your table would change overnight enhancing its beauty manifold.
Duck taped CD and DVD monsters
Cover the CD and DVDS with duck tapes of different contrasting colors.
- Cut triangular shapes (isosceles) from contrasting tapes and wrap them around the sides of the CD’s.
- For making a hideous mouth and a row of monstrous serrated teeth, eyes and mouth, cut out small triangular/round pieces of white tape and fix them up just as you wish to create the monstrous face.
- You may draw fine lines with a sketch pen to mark out lines of separation between one teeth and the other. There you have your eerie monster to give you the jolt of your life.
CD lamps: Now, this is something really creative!
You could try out your construction skill for making two types of lamps.
Desk lamps:

Here you need a long strong metal wire. Bend the wire into circular coils leaving space through the centre so that your electric wire runs through it. The diameter of the wire tower should be slightly smaller than the central holes of the CDs. Run your CDs down the tower until a pile of CD covers it. Fix a lamp atop the tower and viola, your desk lamp is ready.
Hanging lamps:
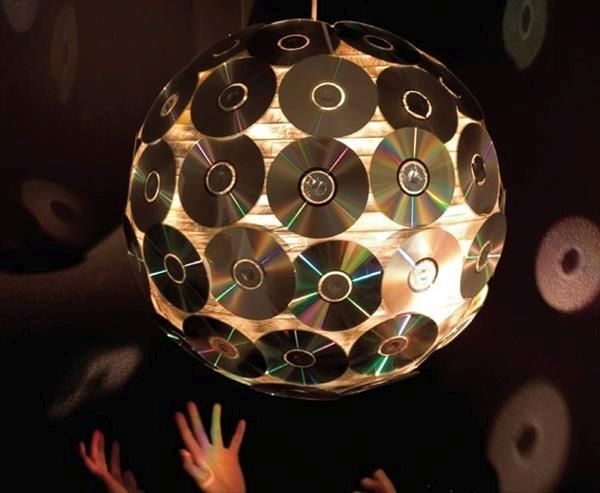
Tie a large knot at the end of a rope and pass your CDs down the rope. When the CDs get packed in a pile, slide the LED stick through the centre. Now you have the amazing hanging lamp – your dream craft set on the table.
Last but not least, you can make CD and DVD candleholder out of stuff you were about to discard. For creating one, you will need glass marbles, old CD and DVD’s, fast glue, and tea light candle. Glue marble all along the circular edge of the CD to frame the first layer. Construct subsequent layers placing marbles in the gaps between two marbles of the preceding layer. Now, continue constructing marble layers until the desired height is reached. Allow the glue to dry. Set a tea light candle at the centre of the disc and see how beautiful it looks.