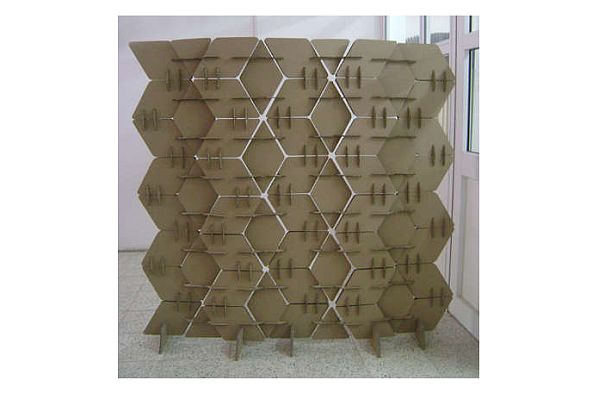
A room divider is a part-time structure to ensure privacy in a room. It can also be used to create different zones in the same room. Now, you can design and construct your own room divider with cardboard. All you need is some cardboard, patience and this tutorial. So, what are you waiting for? Go ahead and make your own cardboard room divider.
Difficulty level
This project is simple. But it requires a lot of effort and patience to complete. It is thus graded as ‘Moderately easy’.
Time required
This depends on the skill level of the maker. It can be done within an hour if quick. To give a conservative estimate, we would say that it needs about 2 hours to complete this project.
Resources required:
- Cardboard of 4mm thickness
- Cardboard of 7mm thickness
- A ruler
- A good scissors
- Utility knife
- Pencil
- Geometry set
Estimate cost
The cost for the whole project will be around $5-$10. The only expense is on the cardboard to be purchased.
Instructions
1. The most important and vital step here is to create templates on cardboard. Use the pencil and other geometry instruments to draw the template on to paper.
2. Draw the different templates necessary on to the paper. There are five basic shapes and sizes that you would require which are called parts A, B, C ,D and E. The images are posted for reference. All the measurements too are presented in the image. Study the images carefully before starting the project.
3. Use these templates on paper to draw the same on to the cardboard. Use a pencil so that the marks can be erased later.
4. Use 4mm cardboard sheets to make the parts A, B, C and D. For making part E, please use 7mm cardboard.
5. Now you have to start connecting all the parts together. Connect 4 B parts along the edges of the A part. Do this with the C part that acts as the connector. Connect the two B parts also with the C part. The D part goes across the A and through two Bs. The whole thing will be one unit. It will become clear from the image below.
6. Keep making connections between the various pieces. This is the part which requires maximum patience and effort.
7. Make two such sheets. This means that all the connections made have to be done once again to create another sheet. This is used to reinforce the divider.
8. Attach the part E as the base legs for the whole room divider. The two sheets will fit into the part E which acts as legs.
9. For making the fitting into part E, you will have to split apart the final few part A. Connect the parts E between the parts B.
Frequently asked questions
1) How many pieces of the parts A, B, C, D and E would I require to complete this project?
Ans: The making of the room divider will require 16 A parts, 80 B parts, 70 C parts, 64 D parts and 5 E parts. It is always good to have a few extra in stock because the cardboard may get bent or twisted while making the project. Even if you do not cut out extra sheets, please keep a stock of extra cardboard just in case.
2) Can I use thicker varieties of cardboard to make sturdier dividers?
Ans: The sizes suggested in this DIY article are the best possible ones to give you a perfect mix of strength, stability and flexibility. Thicker cardboard will get harder to cut and cumbersome to move and shift. Thinner ones will be compromising on stability. But nobody can stop you from experimenting to come up with the perfect solution that satisfies you.
Quick tips:
1. You can decorate the cardboard with designs before cutting to get a new looking divider.
2. Do this as a group project to have fun and break the monotony of repeated actions.
Things to watch out for
1. Be careful while handling the sharp utility blade. It can cut your fingers.
2. Get the measurements perfectly. Any wrong measurement will spoil the symmetry of the room divider.
3. Do not place the divider near a fire. A strong breeze may blow it over and then it will present a fire hazard if there is a flame nearby.


