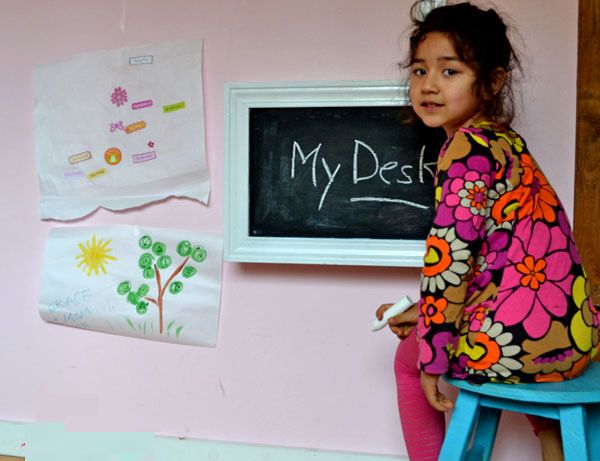

All-rounders are always appreciated. And so, when it comes to making something that could prove to be triply useful, the project is bound to get noticed. A flip-down wall art-desk which can serve as a blackboard, a desk and a storage area for kids would be a wonderful DIY project which could also double as an innovative gift to parents of toddlers and youngsters. So, without much ado, here is how to make it:
online pharmacy buy zyban online with best prices today in the USA
High points
- It works excellent as a child’s storage desk.
- The child can also use the project as a writing blackboard.
- The flip-down desk occupies very little space and yet opens into an elaborate work-space. This is a perfect solution for crammed homes.
- It is very easy to mount and make use of. It can be fixed at different heights to serve different needs.
- The storage space is ample and the art-desk occupies zero floor-space.
Resources required
- 3/4″ plywood 16″ x 24″ – one piece
- 1×4 @ 10 feet long – one piece
- Hinge supports – 1 set
- Basic hinges – 1 set
- 3-D ring hangers
- Chalkboard paint (optional)
- Moulding or trim (optional)
- 2-inch screws
- 2-inch finish nails
- Wood glue
- Wood filler
- 120-grit sandpaper
- Primer
- Paint
- Paint brushes
- Measuring tape
- Geometric Square
- Drawing pencil
- Safety glasses
- Hearing protection
- Drill
- Circular saw
- Nailer
- Sander
- Level
- Countersink drill bit
Process
Before you launch into the project, view the gallery and refer to the same for any doubts regarding the steps and instructions. The images will make the whole process amply clear.
- Refer to the image attached to understand the shape and structure of the project. Mark the joints using the pencil and make use of the wood glue while joining.
- While installing the hinge supports, read the instructions to make sure there is sufficient clearance on all the sides.
- Fit the top and bottom of the art desk at the end after making the internal structures. Drill holes of 0.5 inches diameter for the paper rolls.
- Take the chalkboard. In case its edges are frayed and not fine, make use of a trim to bound the board from all sides.
- Add properly configured support hinges to so that the top doesn’t fall open. These hinges should support the desktop.
- To hang the art desk on the wall, make use of D-ring hanging brackets.
- The finishing is the last and important process. Make use of the wood-filler to fill up the holes and obtain a smooth finish. As needed, apply additional layers of wood filler also.
- Sand in the direction of the wood-grain and vacuum clean the shavings and wood dust thus produced.
- Wipe the entire project clean with a damp cloth and proceed to the painting after applying the primer.
Tips
- Read the entire process before beginning the project.
- You could use this entire project to make an interesting, useful and beautiful gift.
- You can change the breadth and height of the desk as per your needs. Do not alter the depth however because there would be no support then.
- Apply test coats of the primer and paint to test the needed consistency and thickness before proceeding with the actual project.
Via: AnaWhite