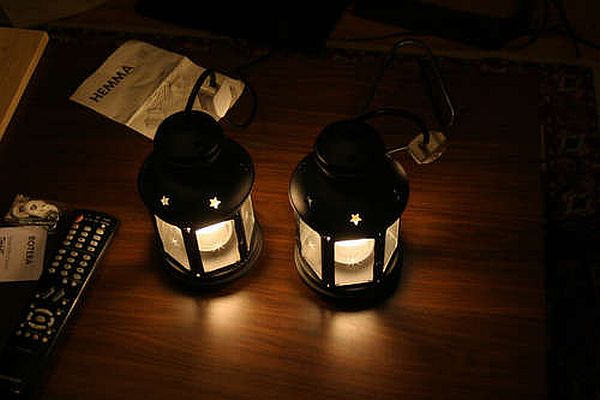

Ikea hanging lanterns look cool and beautiful. You feel like purchasing them when you see them. But, would it not be a matter of great satisfaction if you can make lanterns like them at home, all on your own? To do so, you don’t need any special skill or talent. This DIY project tutorial will show you how to make a hack of the Ikea lantern using a simple candle lantern that is cheaply and easily available. Once you make it, you can use it at your bedside or as a decorative piece. So, without wasting another moment, go ahead and make your own Ikea lantern.
Difficulty level
This project involves the use of many different tools which may require a bit of experience to handle. Thus, we grade this project as ‘moderately easy’ in the difficulty level.
Time required
The whole project will require about 30 minutes to one hour. It mostly depends on how fast and good you are at using the rotary grinding tool.
Resources required:
1. Candle lantern (from Rotera or any other brand)
2. Hemma hanging lamp base
3. Rotary grinding tool
4. Center punch tool
5. Ikea size light bulbs (they come in a pack which contains two bulbs)
6. Small size wire nut 16 – 22 (can get this from any hardware store)
7. Screwdriver
8. Exacto knife
9. In line lamp switch (can get this from any hardware store)
10. Hammer
11. Drill
Estimate cost
If you have all the tools necessary to do the project, the only expense will be to purchase the candle lantern. Even if you lack some of the resources, they can easily be purchased. We estimate that this project should get done between $15 to $20.
Instructions:
1. Take the Rotera candle lantern to separate the top from the bottom.
2. There is a ring on the inside of the lantern that clamps and holds the top to the rim of the base. Use the rotary grinding tool to grind away at this and separate it.
3. Now we have to fit the lamp socket that we have into the lantern. This means that you will have to grind at the sides of the openings to ensure that the lamp socket fits in.
4. Using the center punch, make a dent in the middle of the top portion.
5. Make a hole with the drill. Then use the grinder to take away the flat portion on the top of the lantern. With this, all the ‘grinding’ work on the lamp is done.
6. Now you can begin the wiring work. Cut a wire length of about 8 inches assuming that the lantern will be used as a bedside lamp.
7. Strip the outer casing of the two wires located inside.
8. Now, strip each of the wires inside the casing at their ends. They will mostly be black and red or black and white.
9. Take the lantern and thread its top to the socket, fitting it to the keeper ring.
10. Wire up the black wires to the screw leads which are used to connect to the switch. This should be done inside the switch.
11. You had cut the cord in the beginning. So, now reconnect the neutral wire.
12. Screw back the switch into its position and with this step you would have completed the wiring process.
13. Take the lantern by its base and slide in the socket.
14. From the inside of the lantern, tighten the keeper ring.
15. The next step would be to install and establish the light inside the glass.
16. Once all these are done, close the door of the lantern.
17. Plug in the wire to the socket and turn on the switch. Try this out at night after turning off all the other lights for best effects. Your marvelous Ikea ‘hack’ lamps is ready for use.
Frequently asked questions
1) The rotary grinding tool does not go all the way in the lantern. How do I grind out the top?
Ans: This is indeed a problem. There is a workaround however. Use the rotary grinding tool to grind till about half way. Then twist and turn with your hands to separate the top from the bottom.
2) I want to place my lantern as a hanging on the wall. How much wire should I cut?
Ans: Cut the wire length for the lantern according to the use you are going to put it to. The wire size will be different based on whether you use it as a decorative lantern or as a bedside reading lantern. If you are hanging the lantern from a wall, measure the length of the wire needed from the switch to the lantern. When you measure this, trace the exact route that the wire will be laid along. Do not take it across space or in a criss-cross. After you have obtained an estimate of the wire length that you need, add another 5 percent as standby.
Quick tips:
- The entire unpainted portion of the lantern is about the same size of the socket to be placed. So, you can completely grind it away.
- You can use wire nuts inside the switch to give an overall clean look to the lantern that you are making.
- You can paint the glass of the holder in a way of your choice. This will lend beauty to the lantern and also reduce the out put of light. Thus, it can also be made to function as a night lamp.
Things to watch out for:
- When you are stripping away the outer black casing of the wires, be careful not to cut the inner two wires. You can do the whole process elegantly by making a slit on the outer casing and using a pair of nose pliers to pull it away.
- When you fix the socket to the top of the lantern, make sure that the fitting is perfect with the keeper ring and there is space for the wires to come out from the top.
- Ensure that you always wrap a wire clockwise around the screw. This will ensure that the connection becomes more firm as you tighten the screw. Else, as you tighten the screw, the wire will actually get unwound.