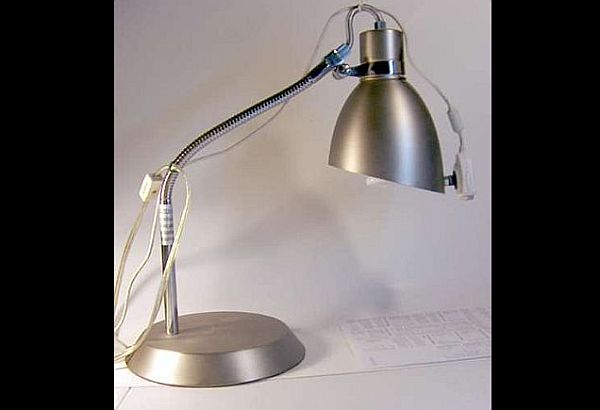

Neither does a normal webcam provide an impressive magnifying capacity, nor do they work too well in low light. Often, this poses to be a big problem, especially for people with imperfect vision. This article teaches you how to overcome this problem. A magnifying webcam-lamp is something that can be the answer to both these worries. It allows you to get reasonably good magnification (up to 4.5 times), as well as utilize the webcam efficiently in a room with low light. The magnifying webcam lamp is basically a webcam safely attached to a movable table lamp which can be optimized to magnify any reading material .The best part is that this piece of machinery can be built at home and at a low cost with some amount of effort and knowledge.
Difficulty level:
Building a magnifying webcam-lamp requires some basic skill and knowledge. However, there is no reason to think that it cannot be built successfully at home. Thus the difficulty level can be said to be moderate.
Time required:
Building this webcam-lamp takes merely 1-2 hours.
Resources required:
1. A desk lamp which is adjustable and may be aimed downwards with ease.
2. A computer display is required and a large monitor is usually favored.
3. A webcam.
4. A 1/4”-20 bolt which should be around 1.5 inches in length.
5. A1/4”-20 nut.
6. A1/4”-20 free-spinning washer nut.
Estimated cost:
The cost of the above mentioned hardware items should not be more than $1.50, and the cost of the total magnifying webcam-lamp should be around $5 to $10.
Instructions:
To build a magnifying webcam-lamp, one should be following the instructions provided below, closely:
1. First thing you need to do to make a magnifying webcam lamp, is to drill a hole on the top of the lamp’s plastic cover. Judge the exact location of the hole. The position should be such that when you attach the webcam to the lamp, it should be facing downwards towards the table on which it is placed. Moreover, the hole or the position of the webcam does not interfere with the light of the lamp. Often, placing the camera on one side of table lamp is a convenient option. Also, make sure that the drill used has a bit of dimension – ¼ inches – so that the nut and bolts used, fit the hole accurately. Once the hole is made, it should be cleared to get rid of all the burrs.
2. After the hole is made, it is time to put the bolt in it. The bolt should be placed in such a way that its end continues to stick out. The nut is to be screwed on the top. In case the setup does not feel strong or stable enough, you can opt for gluing the bolt as well as the nut so that they do not budge from their respective places.
3. The third step is a relatively easy one. All that you have to do is to take the spinning washer and screw it on the bolt. However, care is to be taken that the washer always faces out after it is screwed on.
4. Now, you have come to the fourth and the final step of building an efficient magnifying webcam-lamp. In this step, the webcam is to be screwed on the lamp case. The webcam is to be screwed on the outer end of the bolt. It is held in this position tightly with the help of the free spinning washer. Once this is completed, you may attempt to attach the USB cable. Care is to be taken that the cable does not come in the way of the movements of lamp. Try using a few nylon ties or even bread-twist ties to help attach the USB cable to the body of the lamp.
5. Once all these steps are taken care of, all that is left to be done is installing the software of the webcam on the computer and checking how effective the magnifying webcam-lamp is in reality. To do this, put the webcam in full screen mode and point the webcam-lamp down towards the reading material that is to be magnified. Not only will the magnification be efficient, but thanks to the light from the lamp, this can be carried out in a low light environment as well. This process is extremely helpful while reading or attempting to read any document with very fine print, e.g. maps, schedules of trains or buses etc.
FAQs
1. What is the actual cost of building a magnifying webcam-lamp if you take even the time factor into account?
A. Even if the time is considered, building a magnifying webcam-lamp is not very expensive. The hardware that has to be purchased for building it comes within $1.50 and the total amount comes to about $5-$10. This is not too costly even for a person with limited budget. Apart from the fact that building a magnifying webcam-lamp requires some amount of basic knowledge and skill, a person possessing both of these should not take much time to build it. One or two hours should be enough. So considering time or otherwise, making a magnifying webcam is not a very expensive procedure.
2. Is there any method which can be used to achieve a much higher magnification for people who have poor eyesight?
A. This can probably be achieved by using a webcam that has a very high zoom and close up facilities. One with a high resolution of about 720p or higher should be used in these cases. You would however have to find suitable software which allows a webcam to be used as a simple viewer. Certain devices like the iPad can also alternatively be used to achieve a very high and effective zoom.
Quick tips:
1. If you want to save money, you can look for the items needed in surplus sheds. The deals there would be cheaper. However, do remember to check the condition of any item that you intend to purchase.
2. Attach the webcam on the side of the lamp facing away from you for maximum effectiveness.
3. In case you want to make use of a magnifying glass, do measure the focal length of the lens you are using.
Things to watch out for:
The images obtained by this method, may not be too crisp and clear. Though there are other processes for attaining magnification, which may be more effective, this is the most simple and easy one.